Modern JavaScript frameworks present an easier and more organized way to create web applications. However, they also add complexity that sometimes breaks things in a subtle yet impactful way.
To combat this and ensure we don’t introduce more bugs than we fix, we can turn to automated frontend testing. The best form of automated tests? Running through the interface as a real user would, clicking on buttons and filling out forms.
Today I’m going to introduce you to testing with Cypress.io — a modern, frontend-centric testing framework. But first, a bit of history!
The old ways
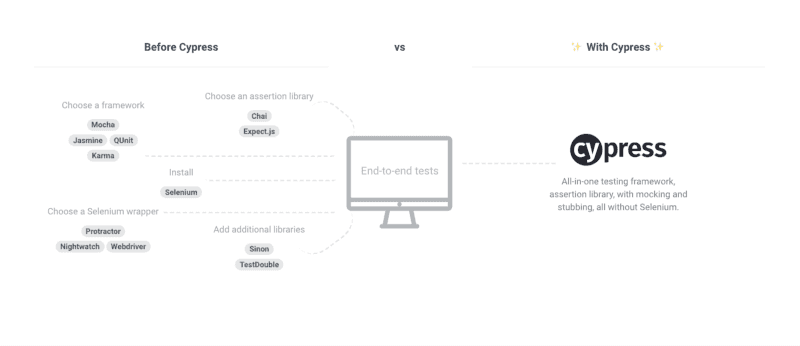
For years we have relied on tools like Selenium for End-to-End (E2E) tests on Multi-page web applications. They worked great. They let us write tests in any language (Ruby, Python, JavaScript, etc.) through specific language binding. They also featured a robust community for support and examples.
Then we moved to Single-Page-Applications (SPA) with complex JavaScript code using frameworks like React, Vue.js or Angular. They have an API written in a server-side language like Ruby, Python, Go, or Node.js. Now things started to break.
Selenium and similar tools were designed to test applications that require a full-page refresh. Supporting SPAs with Ajax data fetching was an afterthought. This lead to many issues with timing and flakey tests. Tests would sometimes fail due to slow API requests or network latency. Fixing these flakey tests typically required adding sleep statements and increasing timeouts. This made the test code more brittle. Not to mention extremely slow.
It’s worth mentioning Google’s Puppeteer has inner access to web browser events, allowing us to wait on things like Ajax calls. However, writing tests with Puppeteer requires more initial setup work and more effort to write each test than it should.
Most developers and teams I talked to just gave up on the premise of E2E testing. They only use automated tests to verify API requests/responses and (rarely) unit tests for their JavaScript frontends.
Unit testing vs. integration testing vs. E2E testing
Before going further, let’s take a look at the different levels of testing:
- E2E testing — testing functionality as close as possible to a real user in an automated fashion.
- Integration testing — testing the interaction between two or more units of code. For instance, checking the API responds as expected when it is called. This invokes all the layers of functionality from the HTTP request to the database request and back.
- Unit testing — testing one unit of code in isolation. Given an input, it responds with proper output.
Generally speaking, what I typically recommend is starting with the E2E test first and testing the happy path (no edge cases). This will execute a large portion of the code. It increases your confidence the feature is delivered correctly. It also ensures future implementers don’t break it through a regression bug.
Next, if there is an API change, you should write an integration test covering at least the happy path and one primary sad path (e.g. record is found and returned, and record not found).
Finally, if there is a lot of branching logic (i.e. conditionals, loops, etc.) that might not get executed by the former two testing levels, you should write the unit tests.
In this article, we will be focusing on End-to-End testing for your frontend.
No more excuses
Today, we have no excuse not to have strong test coverage. Every feature that ships to real users should be covered by End-to-End tests using Cypress.io at a minimum. Ideally, you’d also have integration and unit tests with Jest on the client side and your backend language testing framework (e.g. RSpec for Ruby).
This applies whether you are following Kent Beck’s Test Driven Development (TDD), or the closely related Behavior Driven Development (BDD). With TDD you first write the test then the implementation code. With BDD you write the implementation first (to experiment with the design of your code) and then the tests. These are the tests you should have:
- End-to-End tests — high-level tests of the green paths (everything going right) and a select few red paths (where one or two things go wrong).
- API request tests — sending a request to your API and expecting a specific result.
- Frontend unit tests — unit tests for things like components rendering, library code helpers, state transition code, etc.
Unsurprisingly, we will focus on #1 here: creating End-to-End tests using Cypress.io, where tests will act like a real user. You should absolutely have automated tests for your backend API; how you write those will depend on the language and framework you use. As an example, we use Ruby on Rails for our API and Rspec Request Specs for automated tests. Finally, for your client-side or frontend tests, look at Facebook’s Jest framework.
What sets Cypress.io apart?
Cypress.io is a relatively new framework. It overcomes many shortcomings found in Selenium, Phantom.js, and others before them. It uses an event-based architecture that hooks into Google Chrome’s lifecycle events. This enables it to wait for things like Ajax requests to complete without using a polling/timeout mechanism. This leads to reliable and fast tests.
You can think of Cypress.io as the Redux of automated testing, with features like time travel, diff-ing of the current and previous state, live code reloading, and much more. You can even use all the debugging tools you know and love with Chrome (even installing additional tools like React Dev Tools and Redux Dev Tools).
Best of all, you will see it all happen right in front of your eyes. With a second monitor, you can quickly spot your tests running as soon as you save your changes in the test file. This will save you a lot of time writing tests, debugging broken tests, and make tests fun to write.
In short, it is truly the future of E2E testing and how it should have been in the first place.
Cypress testing tutorial
All right, let’s get down to business.
Adding Cypress to your project
Imagine you were asked to fix a nasty production bug — one that prevents a subset of your users from logging into your beautiful app. The bug seems scoped to your pro users.
Good news: you got Cypress to elevate your game and quickly reproduce the bug. Let’s add Cypress to our project and write a test to log into our system.
$ yarn add cypress --devNext, open Cypress.
$ yarn run cypress openNow let’s create our test file:
// cypress/integration/login.spec.js
describe('login', () => {
  beforeEach(() => {
    visitLoginPage()
  })

  it('A User logs in and sees a welcome message', () => {
    loginWith('michael@example.com', 'passsword')

    expect(cy.contains('Welcome back Michael')).to.exist
  })

  it('A User logs off and sees a goodbye message', () => {
    loginWith('michael@example.com', 'password')
    logout()

    expect(cy.contains('Goodbye! See you soon!'))
  })
})

const visitLoginPage = () => {
  cy.visit('http://localhost:3000')
}

const loginWith = (email, password) => {
  cy.get('[name="email"]').type(email)
  cy.get('[name="password"]').type(password)
  cy.get('button').click()
}
const logout = () => {
  cy.get('button').click()
}
The above tests if a user can successfully log in and off our platform. On a successful login, they see a message that says: “Welcome back {firstName}”. On a successful log off they see a goodbye text.
All of Cypress’s functionality is available under the global cy object you can see above. There is no need for any async/await or any asynchronous non-sense. Tests execute one step at a time, waiting for the previous step to complete.
There are functions to retrieve DOM elements like get() as well as to find text on the page using contains(). You can write the tests in Behaviour Driven Development style and focus on the high-level actions the user is performing like login/logout using standard JavaScript functions to hide the details.
Tip: Remember to always keep the intention of your tests clear. If you want to group several related steps, you can do so in a function. In the above example, we are testing whether the user can login successfully with a specific username and password. You can hide irrelevant details like the exact buttons clicked in private functions to reduce the noise.
Let’s add another test to test login with a pro user:
it('A Pro User logs in and sees a thank you message for the first time', () => {
  loginWith('new-pro@example.com', 'passsword')
  expect(cy.contains('Thank you for supporting us!')).to.exist
})

it('A Pro User logs in and sees and sees a welcome message', () => {
  loginWith('old-pro@example.com', 'passsword')
  expect(cy.contains('Welcome back John')).to.exist
})
Running this causes our application to error out in both cases. Looking at the code, it is clear why:
renderWelcome() {
  // oooppps, did we mean logins?
  if (props.user.pro && props.user.login.length === 1) {
    return <p>Thank you for supporting us!</p>
  } else {
    return <p>Welcome back {props.user.firstName}</p>
  }
}
Great! All we need to do is add that s to make it logins and rerun our tests. Sure enough, they all pass. Time to deploy our fix and bask in the glory and praise of our teammates.
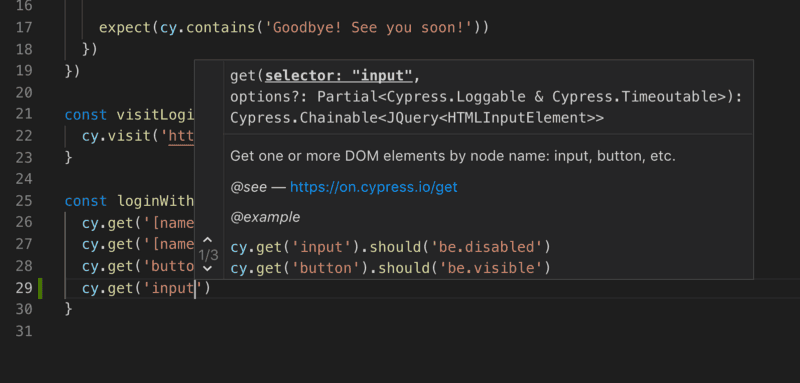
For those of you using VS Code, you can set up autocomplete for Cypress.
Running Cypress
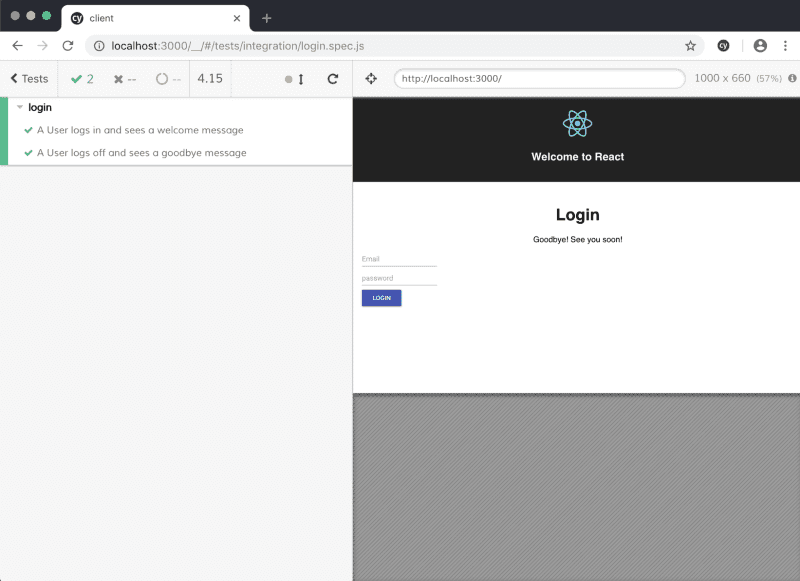
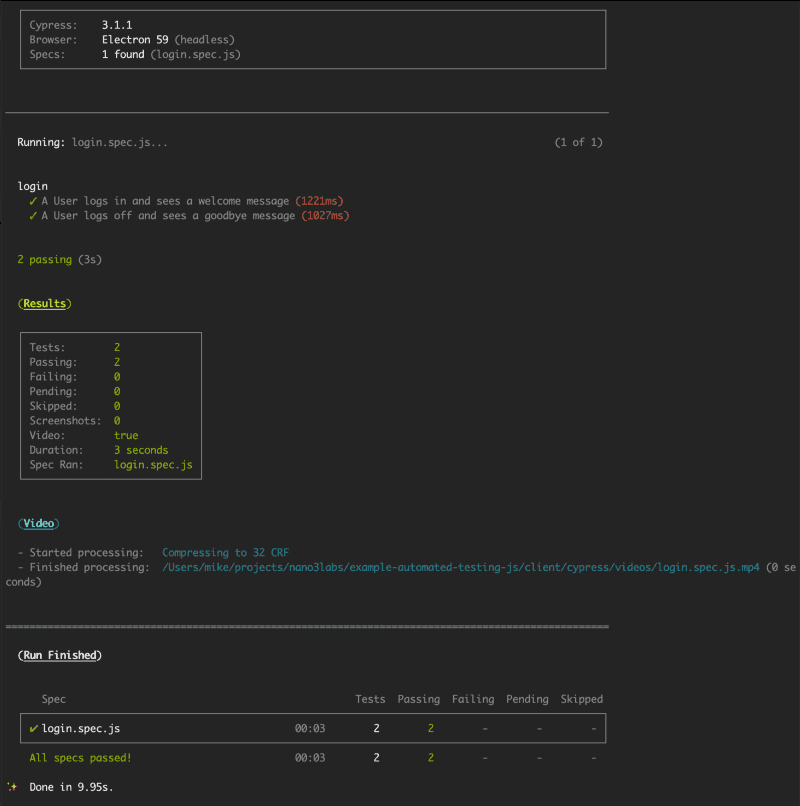
You can run Cypress in two modes: full-mode and headless-mode. The former lets you see your app’s UI and tests performed one step at a time. This mode is excellent for building up your test suite and debugging. The latter is great for a Continuous Integration (CI) environment. Another use case for headless-mode: you just want to make sure you haven’t broken anything with new changes but don’t care about the detailed steps.
To open Cypress in full-mode run:
$ cypress openTo open Cypress in headless-mode run:
$ cypress runHeadless-mode is useful for running on a Continuous Integration (CI) server like CircleCI. Once you start writing tests more regularly as part of your development, you should invest time in getting a CI server configured so that every git commit runs the entire test suite.
Booting your server
Many E2E testing frameworks automatically start the application server and frontend server when you run your test. Cypress doesn’t offer this feature for a few good reasons:
- Framework agnostic — it works with any frontend and backend; how you run your application is specific to the language and framework used.
- Tricky application startup/shutdown — managing a child-process or thread can be tricky. If the testing process is terminated in the middle of a test, the child process is terminated as well and can be left in a bad state. For example, if you clean up database records or rollback transactions after a test has been completed, these records will remain in the database and cause issues on subsequent runs.
- Flexibility — you can choose to run tests against a local server, inside of a CI server, staging or even production with a simple one-line change. You could also write tests that run periodically to check that the application is still accessible (e.g. making sure production login/signup still works).
It will be your responsibility to start the server on another shell and manage it.
e.g. for Node, run:
$ npm startTo open Cypress in headless mode in another shell, run:
$ cypress openResetting state
API Integration Tests and Unit Tests typically require us to reset the application state to allow testing scenarios in isolation. As an example, if you are testing an API endpoint that allows adding an item to a shopping cart, we want to have the item removed from the cart at the end of the test.
E2E tests are closer to how your users will interact with your real application. Most of us don’t blow away the app and database everytime we want to test a feature manually. Therefore, we don’t need to do that every time we want to run our E2E test suite. Remember, E2E tests are designed to automate away manual tests as much as possible.
Let’s say we wanted to test the same add to cart functionality mentioned above in an E2E test. What we could do is simply start a new order every time we run the test.
Occasionally, we cannot avoid restarting the application state and do need to clean-up. We can indeed use after hooks provided by Cypress, but it is not recommended. There is no guarantee any of the after hooks will get fired if the test suite is shutdown or there is some other error that makes it crash unexpectedly. It is a better idea to clean-up before doing the regular setup in your tests. Take a look at the examples below.
Don’t do this:
// not great...
describe('Shopping Cart', () => {
  before(() => {
    cy.login('michael@example.com', 'password')
  })

  it('add item to cart', () => {
    cy.visit('/products/fidget-spinner-1')
    cy.contains('Add To Cart').click()
    cy.contains('Show Cart').click()

    expect(cy.contains('Shopping Cart'))
    expect(cy.contains('Fidget Spinner'))
    expect(cy.contains('$10.00'))
  })

  after(() => {
    // not guranteed to be called if you quit before test completes (e.g auto reload)
    restShoppingCart()
  })
})

const resetShoppingCart = () => {
  cy.visit('/')
  cy.contains('Show Cart').click()
  cy.contains('Reset Cart').click()
}
Clean-up before test runs:
// This is what you want...
describe('Shopping Cart', () => {
  before(() => {
    cy.login('michael@example.com', 'password')
  })

  beforeEach(() => {
    resetShoppingCart()
  })

  it('add item to cart', () => {
    cy.visit('/products/fidget-spinner-1')
    cy.contains('Add To Cart').click()
    cy.contains('Show Cart').click()

    expect(cy.contains('Shopping Cart'))
    expect(cy.contains('Fidget Spinner'))
    expect(cy.contains('$10.00'))
  })
})

const resetShoppingCart = () => {
  cy.visit('/')
  cy.contains('Show Cart').click()
  cy.contains('Reset Cart').click()
}

it('A Pro User logs in and sees a thank you message for the first time', () => {
  loginWith('new-pro@example.com', 'passsword')

  expect(cy.contains('Thank you for supporting us!')).toBeTruthy
})

it('A Pro User logs in and sees and sees a welcome message', () => {
  loginWith('old-pro@example.com', 'passsword')

  expect(cy.contains('Welcome back John')).toBeTruthy
})
As you can see, the code is almost identical: we just moved resetting the cart into a beforeEach block to execute right before any of our test cases. We also used a before block that runs before any of the it test cases in the describe execute. In this case, we wanted to make sure that we are logged in before any tests start, and that we only need to log in once.
Taking shortcuts
Login and Logout are the most common functions throughout our application. We already wrote a test to test whether a user can log in and log out properly. However, do we really need to go through the whole sequence if we are testing a feature that only logged in users can do? If it takes 1 sec for our login code to run, every subsequent test that requires being logged in will take more than 1 sec to run.
Turns out, we don’t need to only use our UI for testing. We have a perfectly awesome API that responds in 100ms or less (yay modern servers). Let’s take advantage of it with a Cypress request.
If we look at our application code, we will see we use JWT tokens to authenticate with the API and store the token in local storage. Let’s make a request to a login endpoint and store the token. Then we will be logged in as far as our application is concerned.
// cypress/support/commands.js
Cypress.Commands.add('login', (email, password) => {
  cy.request({
    method: 'POST',
    url: 'http://localhost:300/api/v1/users/login',
    body: {
      user: {
        email,
        password
      }
    }
  })
    .then((res) => {
      window.localStorage.setItem('jwt', res.body.user.token)
    })
})
Now we can use cy.login(email, password) login in 1/10 of the time it would take us going through the UI.
In general, it is recommended to take shortcuts like this to set up the conditions for your tests whenever possible. It will speed up your test suite and, in many cases, allow you to do things that are otherwise hard to test.
Closing thoughts
Cypress.io is a robust testing framework. It represents a massive leap in productivity and innovation for testing, with features like time travel, diffing, headful/headless mode, synchronous like code execution and more. As we saw, it is easy to add to your own project and start using it immediately.
So what are you waiting for? Go, code, test and have fun!
References
- Examples of how to use Cypress in common scenarios
- Best Practices in Cypress
- Brian Mann — I see your point, but…
If you’ve enjoyed this post, please take a second to share it on Twitter. Got comments, questions? Hit the section below!
Originally published at snipcart.com.


